
Table of Contents
Introduction: Clean Hunter Boots
This post will go through the method of how to clean hunter boots. If properly cared for, Hunter boots can last for many seasons. Use warm water, dish soap, or an eraser to clean dirt and scuff marks. You can also stuff them with newspaper if they get wet. To keep Hunter boots smelling fresh, use vinegar or baking soda.
Rubber bloom is the white, powdery particles that can appear on Hunter boots and be buffed away. By taking proper care of your Hunter boots, you can extend their lifespan and keep them looking new season after season.
What to Use to Clean Your Hunter Boots?
To clean your Hunter boots, you can use the following items:
- Water
- Dish soap
- Clean cloth
- Basic eraser (preferably white)
- Hunter Boot Care Kit (optional, but recommended)
How do I Clean Hunter Boots Inside and Outside?
How To Clean Hunter Boots Inside?
1. Preventing Odors with Simple Steps
A: Wear Socks with Your Boots at All Times:
- Wearing socks is a simple yet effective measure to prevent odors.
- Socks serve as a protective layer between your feet and the inside of the boots, absorbing moisture and minimizing direct contact.
When you wear socks with your Hunter boots, they serve as a protective layer. Socks absorb sweat and moisture produced by your feet throughout the day. This absorption helps in preventing the accumulation of moisture inside the boots, which is a key factor in the development of unpleasant odors. Additionally, socks can be easily removed and washed, contributing to overall cleanliness.
B: Avoid Leaving Wet Socks Inside to Prevent Mildew:
- Humid and moist conditions provide a perfect setting for the growth of mildew and unpleasant odors.
- Always remove wet socks promptly and allow the boots to air-dry thoroughly.
Moisture, especially in the form of wet socks, can lead to the growth of mildew inside the boots. Mildew not only causes unpleasant smells but can also affect the overall condition of the boots. To prevent this, it’s essential to promptly remove wet socks from the boots. Furthermore, ensure both the boots and damp socks undergo thorough air-drying before putting them on again. This practice ensures that the interior of the boots remains dry and free from the conditions that promote odor-causing bacteria.
2. Quick Drying Tips
A: Stuff Boots with Newspaper:
- After your Hunter boots get wet, crumple up sheets of newspaper.
- Tightly pack the newspaper into each boot, filling the entire foot area.
- Ensure the newspaper is compact to maximize absorption.
When your boots become wet, lingering moisture inside may result in unpleasant odors and potential damage. Stuffing them with newspaper serves as an effective absorbent. The newspaper wicks away excess water from the interior, promoting quicker drying.
B: Use Moisture-Absorbing Packets:
- You also have the option of utilizing moisture-absorbing packets such as silica gel or cedar balls.
- Place the packets inside each boot.
- Make sure to distribute them evenly, covering the toe and heel areas.
Silica gel and cedar balls are excellent moisture absorbers. Silica gel, commonly found in packaged products, rapidly absorbs moisture. Cedar balls not only absorb moisture but also add a pleasant scent. Both options aid in preventing mold growth and minimizing any lingering dampness inside the boots.
C. Let Boots Air Dry:
- Let the boots rest in an area with good ventilation.
- Store them in a location where they are shielded from direct sunlight and kept away from artificial heat sources.
- Keep the newspaper or moisture-absorbing packets inside until the boots have thoroughly dried.
Allowing the boots to air-dry naturally is crucial. Placing them in a well-ventilated space ensures proper airflow, aiding in the evaporation of moisture. Avoid direct sunlight and artificial heat, as excessive heat can potentially damage the rubber material of the boots.
3. Dealing with Lingering Odors Method:
A: Create a Diluted Vinegar Solution:
- Combine an equal ratio of white vinegar and water either in a bowl or a spray bottle.
- For example, you can use one cup of water and one cup of white vinegar.
- Mix the mixture thoroughly to ensure it is properly diluted.
Vinegar is known for its natural deodorizing properties. The acidity in white vinegar helps neutralize and eliminate unpleasant odors. Adding water to the solution ensures its mildness on the interior of your Hunter boots.
B: Lightly Mist the Boot’s Interior:
- Using a spray bottle, lightly mist the diluted vinegar solution throughout the interior of the boots.
- Make sure to address the entire interior surface, encompassing both the toe and heel regions.
- Do not oversaturate; a light misting is sufficient.
The misting facilitates the even distribution of the diluted vinegar solution throughout the interior. The vinegar works to combat and neutralize any lingering odors. The misting process ensures that the solution reaches all areas inside the boot without making it excessively wet.
C: Let it Dry in a Cool Place:
- After spraying, allow the boots to air-dry in a cool, well-ventilated area.
- Keep the boots away from direct sunlight and sources of heat.
- Ensure that the boots have ample time to thoroughly dry.
Allowing the boots to dry in a cool place ensures that the vinegar solution has ample time to work on eliminating odors. Proper ventilation facilitates the evaporation of moisture, leaving the interior fresh. Avoiding direct sunlight and heat prevents any potential damage to the rubber material.
4. Moisture Absorption with Baking Soda
A: Sprinkle Baking Soda into Each Boot:
- Take 2-3 teaspoons of baking soda.
- Evenly spread the baking soda inside each boot, ensuring it covers from the heel to the toe.
- Let the baking soda sit inside the boots overnight.
Baking soda is recognized for its ability to absorb moisture and neutralize odors. By sprinkling it inside your Hunter boots, you create an environment where excess moisture is absorbed, and any undesirable odors are neutralized.
B: In the morning, invert the boots and give them a good shake.:
- After allowing the baking soda to work overnight, turn the boots upside down.
- Gently shake the boots to eliminate any surplus powder.
- Ensure that the boots are free of visible baking soda residue.
Shaking the boots upside down serves to eliminate any leftover baking soda. This step is essential to prevent your feet from coming into contact with baking soda particles when you wear the boots again.
C: Air Out the Boots:
- Leave the boots in an open, well-ventilated area during the day.
- Store them in a location where they are shielded from direct sunlight and kept away from artificial heat sources.
- Allow the boots to fully air dry before putting them on again.
Allowing the boots to air out is crucial for the final phase of the cleaning process. This step ensures that any remaining moisture and residual odors are dissipated, leaving the boots dry, fresh, and ready for use.
How do I Clean Hunter Boots Outside Clean?
1: Knocking Off Excess Dirt
A: Knocking Off Excess Dirt:
- Take boots outside: Head outdoors with your Hunter boots.
- Knock them together: Hold one boot in each hand and gently knock them together, focusing on the heels colliding.
- Repeat several times: Continue knocking to ensure the removal of any large pieces of debris or mud.
It’s essential to take the boots outside to prevent creating a mess indoors. Knocking the boots together helps dislodge and remove large pieces of dirt or mud that may have accumulated during use. This initial step is effective in minimizing the amount of mud you’ll need to clean off later.
B: Mix Warm Water with Dish Soap:
- Prepare a mixture: Prepare a spray bottle by filling it with one liter of warm water.
- Add dish soap: Add 4.9 mL (1 teaspoon) of dish soap into the spray bottle.
- Shake well: Seal the bottle and shake it vigorously to form a soapy mixture.
Creating a soapy mixture is the next step in the cleaning process. This mixture is effective in breaking down dirt and grime on the exterior of the boots. The warm water ensures that the soap is easily spread and covers the entire surface of the boots.
C: Spray Boots and Let Sit:
- Apply the mixture: Apply the dish soap mixture to the entire surface of the boots, including the soles.
- Let it sit: Allow the soapy mixture to sit on the boots for about 3 minutes.
Spraying the boots with the soapy water helps in loosening dirt and stains. Allowing it to sit for a few minutes enhances the cleaning process, making it easier to wipe away accumulated grime.
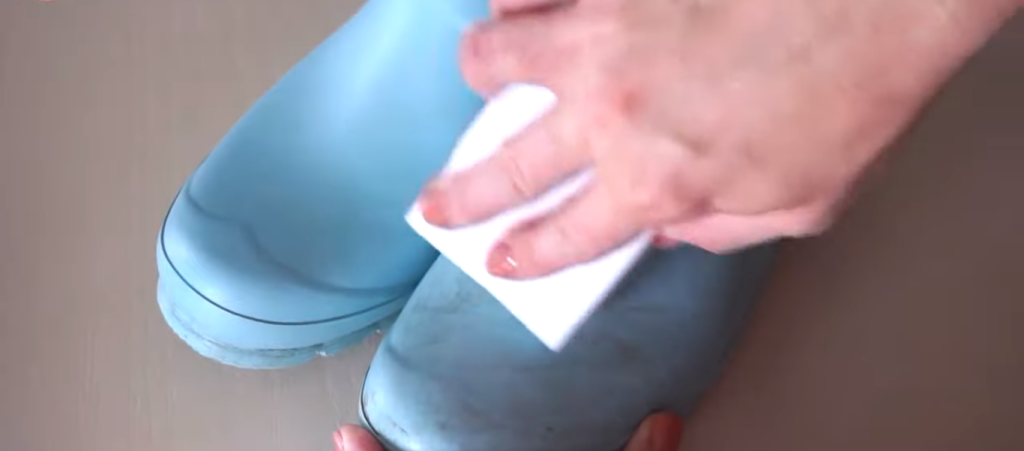
D: Wipe with a Clean Rag:
- Wipe away the dirt: After three minutes, utilize a fresh cloth to remove the soapy water and dirt from the boots.
- Start from the top: Start the cleaning process from the upper part of the boots and gradually move downward to the soles.
The wiping process removes the loosened dirt and soap residue. Starting from the top ensures a systematic cleaning approach, preventing the transfer of dirt from higher areas to already cleaned sections.
E: Dry Boots and Erase Scuff Marks:
- Air-dry boots: Allow the boots to air-dry by placing them in a well-ventilated area away from direct sunlight.
- Remove scuff marks: For scuff marks, use a clean pencil eraser to gently rub them away.
Air-drying is crucial to prevent damage to the rubber material. Erasing scuff marks enhances the boots’ appearance, keeping them in top condition.
2. Soap and Water Cleaning Method:
A: Prepare the Cleaning Solution:
- Fill a spray bottle with warm water.
- Include a small quantity of dish soap into the water.
- Aim for approximately one teaspoon of dish soap for every liter of water.
- Seal the bottle and shake it thoroughly to form a soapy blend.
A mild and efficient cleaning solution can be created using warm water and dish soap. The warm water boosts the cleaning effectiveness, working in synergy with the soap to break down dirt and grime.
B: Spray Boots and Allow Soaking:
- Place the Hunter boots in a utility sink or a large plastic container.
- Spray the entire exterior of the boots, including the soles, with the soapy water mixture.
- Allow the boots to sit for about 3 minutes to let the soap penetrate and loosen dirt.
Spraying the boots with the soapy water solution ensures even coverage. Letting the solution sit for a few minutes helps to soften and lift dirt, facilitating easier wiping.
C: Wipe Away Soap and Dirt:
- Take a clean rag and start wiping the boots from the top down to the soles.
- Ensure thorough cleaning, paying attention to any scuff marks or stubborn dirt.
- If the cloth gets excessively dirty, wash it with water and proceed with wiping.
The clean rag acts as a tool to remove the loosened dirt and soap from the boots. Wiping from the top down ensures that you capture all the dirt as you work your way toward the soles. Rinsing the rag prevents spreading dirt around and allows for continued effective cleaning.
D: Dry Boots Properly:
- Allow the boots to dry naturally in an area with good ventilation after cleaning.
- Avoid direct sunlight and artificial heat sources during drying to prevent damage to the rubber.
Allowing the boots to air-dry naturally is essential. Placing them in a well-ventilated space ensures proper drying, maintaining the integrity of the rubber material.
3. Erasing Scuff Marks Method:
A:. Use a Regular Pencil Eraser:
- Identify scuff marks or stains on the exterior of your Hunter boots.
- Take a standard, clean pencil eraser and apply gentle pressure to the scuff marks.
- Employ a back-and-forth or circular motion based on the type of scuff.
Pencil erasers are effective for removing scuff marks on rubber surfaces. The soft but abrasive nature of the eraser helps lift off the marks without causing damage to the boot’s material. This approach is especially effective for preserving the visual charm of your Hunter boots.
B: Wipe Away Eraser Debris with a Clean Rag:
- Once you’ve erased the scuff marks, use a clean, dry rag to wipe away any eraser debris.
- Ensure that all residue from the eraser is removed, leaving the boots clean and free from marks.
C: Inspect for Additional Scuffs:
After using the eraser, there might be eraser particles or rubber debris on the boots. Using a clean rag to wipe the boots guarantees the removal of any lingering debris. This step adds to achieving the boots’ ultimately clean and polished look.
- After the initial erasing, inspect the boots for any remaining scuff marks.
- If there are additional marks, repeat the process until satisfied with the results.
Thoroughly inspect the boots to make sure all scuff marks are addressed. If there are still visible marks, go back and use the pencil eraser again. This process can be repeated until the exterior of the boots is free from scuffs.
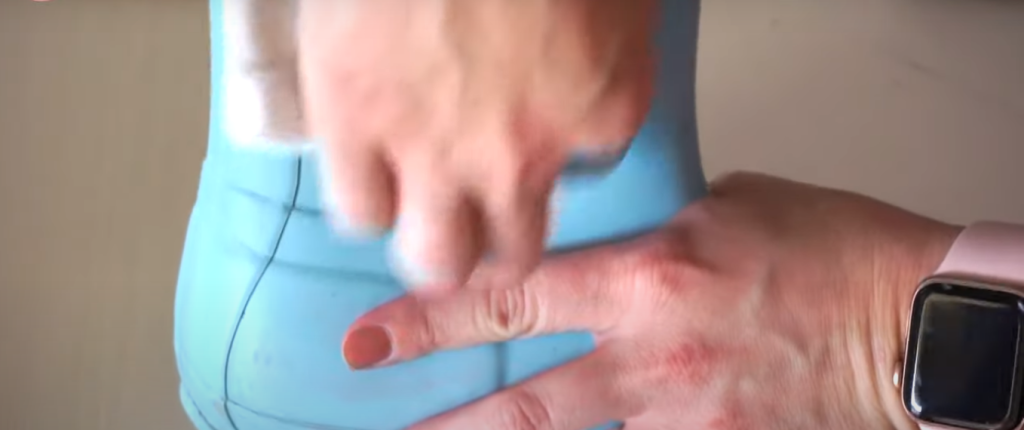
4. Dealing with Rubber Bloom
A: Official Hunter Rubber Care Kit:
- Opt for the official Hunter Rubber Care Kit.
- Follow the instructions provided in the kit.
The Hunter Rubber Care Kit is specially designed to address issues like rubber bloom. It typically includes products like a rubber buffer and boot shine. Following the provided instructions ensures that you use the right combination of products to effectively remove the white, powdery film caused by rubber bloom.
B: Tire Cleaning Products:
- Choose a tire cleaning product designed for rubber surfaces.
- Apply the product to a clean rag.
- Gently buff the exterior of the boots using small, circular motions.
Tire cleaning products are formulated to rejuvenate and clean rubber surfaces. When applied to Hunter boots, these products can help buff away rubber bloom. Using a circular motion ensures even application and effective removal. This method is a practical alternative to specialty boot care kits.
C: Olive Oil on a Clean Rag:
- Apply a modest quantity of olive oil onto a fresh cloth.
- Rub the olive oil all over the boots, excluding the soles.
- Allow the boots to absorb the oil.
Olive oil, although not a traditional solution, can be used as an alternative for dealing with rubber bloom. The oil helps rejuvenate the rubber and may aid in removing the white film. Ensure that you use a minimal amount of oil to prevent the boots from feeling excessively greasy. This homemade solution provides an economical choice for individuals who favor do-it-yourself remedies.
Additional Tips:
- Always air-dry the boots in the shade after using any cleaning method.
- Follow the recommended drying times to ensure thorough drying without damaging the rubber.
5. Air-Drying and Storage Method
A: Wipe Boots with a Clean Rag:
- After cleaning the boots using an appropriate cleaning method (e.g., with warm soapy water), take a clean rag.
- Delicately wipe the outer surface of the boots to eliminate any lingering cleaning solution, dirt, or soap residue.
Wiping the boots post-cleaning ensures that no cleaning agents or dirt residues are left on the surface. This step contributes to the overall cleanliness and appearance of the boots.
B: Let Boots Air-Dry in the Shade:
- Place the boots in an upright position in a shaded area.
- Prevent them from being exposed to direct sunlight while they are drying.
- Allow the boots to air-dry naturally.
Allowing the boots to air-dry is crucial for maintaining their structural integrity and preventing damage. Direct sunlight can cause the rubber material to degrade over time, leading to cracks and discoloration. Air-drying in the shade promotes a gradual and uniform drying process.
C: Store Boots in a Well-Ventilated Area:
- Select a storage area with good ventilation.
- Do not store the boots in enclosed spaces like a closet unless there is adequate ventilation.
- Keep boots away from artificial heat sources, such as radiators or heaters.
Proper storage is key to preserving the quality of Hunter boots. Well-ventilated areas prevent the development of odors and mold. Storing boots away from artificial heat sources is essential, as excessive heat can compromise the rubber’s integrity and lead to deformation.
Final Thoughts:
Cleaning your Hunter boots inside and outside doesn’t have to be a hassle. By following these quick and easy steps, you can ensure your boots remain in top condition, ready for whatever adventures come your way in 2024. Keep them clean, dry, and stylish, and your Hunter boots will continue to be a reliable companion for seasons to come.
How long do Hunter boots last?
Hunter boots are made to last. With proper care, they can easily last for years. Many people hand their Hunter boots to family members or friends once they’re done. If you take good care of your Hunter boots, they’ll take good care of you.
Can you wear Hunter boots in the snow?
No, you shouldn’t wear Hunter boots in the snow. The rubber can get complicated and brittle in cold temperatures, which can cause it to crack. Putting on your Hunter boots after being outside for a while will allow the rubber to warm up, so wear them in the snow if necessary.
Also Read:


